Welcome to our guide on free printable cordless drill charging station plans! These DIY plans help organize your tools efficiently, ensuring drills and batteries are neatly stored and charged.
Overview of the Importance of Organized Tool Storage
Organized tool storage is essential for maintaining a productive and efficient workspace. A well-structured system ensures tools are easy to find, reducing time spent searching and increasing workflow efficiency. Proper storage also protects tools from damage, extending their lifespan. Additionally, it enhances safety by preventing accidents caused by misplaced or disorganized equipment. A cordless drill charging station, for instance, keeps drills and batteries in one place, minimizing clutter and ensuring they are always charged and ready for use. This level of organization not only streamlines tasks but also contributes to a cleaner, more professional workspace. By implementing organized storage solutions, you can maximize productivity and enjoy a more orderly environment.
Benefits of Using a Cordless Drill Charging Station

A cordless drill charging station offers numerous benefits, enhancing both convenience and efficiency in your workspace. It ensures all drills and batteries are stored in one organized location, eliminating the hassle of searching for misplaced tools. By keeping devices charged and ready, it saves time and avoids interruptions during projects. The station also protects your equipment from damage caused by improper storage, extending their lifespan. Additionally, it reduces clutter, creating a safer and more professional workspace. Many designs include customizable features, allowing you to tailor the layout to your specific needs. With a cordless drill charging station, you can enjoy a more streamlined and productive workflow, making it an invaluable addition to any DIY or professional setup.

Materials and Tools Required
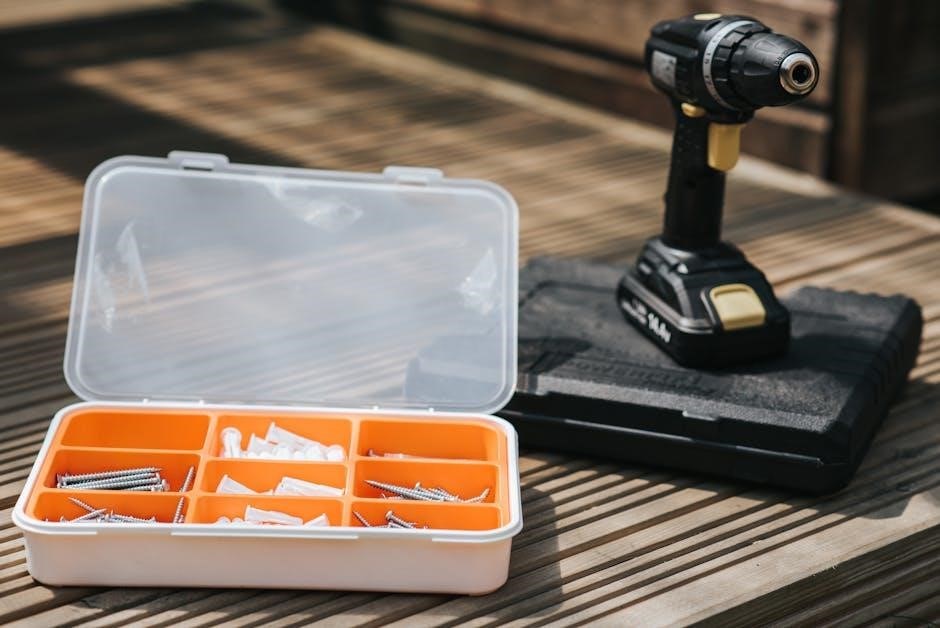
Essential materials include 3/4 plywood, 1/4 or 5mm plywood, 1 1/4 screws, wood glue, sandpaper, and drawer pulls. Tools needed are a drill, saw, sander, and measuring tape.
Wood and Hardware Needed for the Project
The project requires 3/4 plywood for the main structure and 1/4 or 5mm plywood for additional components. Essential hardware includes 1 1/4 screws for assembly, wood glue for bonding, and sandpaper for smoothing surfaces. A drawer pull is needed for the storage compartment. Optional materials include PVC pipes for dividers or spacers for added organization. Ensure all wood pieces are cut to precise measurements using a saw or CNC machine. For durability, consider adding a finish like paint or stain. These materials are readily available at most hardware stores, making the project accessible for DIY enthusiasts. Properly sanding and assembling the components will ensure a sturdy and functional charging station.
Essential Tools for Building the Station
To build the cordless drill charging station, you’ll need a variety of tools. Start with a saw or CNC machine to cut wood according to the plans. A drill press or handheld drill is essential for creating pilot holes and driving screws. Sandpaper or a power sander will help smooth out rough edges. Measuring tools like a tape measure and square ensure accuracy. Clamps are crucial for holding pieces in place during assembly. A screwdriver or impact driver is necessary for securing screws. Optional tools include a nail gun for added reinforcement or a router for decorative edges. Safety gear like safety glasses and a dust mask is also recommended. These tools will help you construct a sturdy and functional charging station efficiently.
Step-by-Step Instructions
Follow detailed guides to cut components, drill pilot holes, assemble parts, sand surfaces, and finish with paint or stain for a polished cordless drill charging station.
Cutting and Assembling the Components
Cutting and assembling the components is the first major step in building your cordless drill charging station. Start by measuring and cutting all the wood pieces according to the plan specifications. Use a saw or a CNC machine for precise cuts. Once all components are ready, begin assembling the frame using screws and wood glue. Ensure all joints are secure and align properly; For shelves or drawers, attach them to the main structure using hinges or slides. Sand any rough edges before moving on to the next step. Proper assembly ensures stability and functionality, making it essential to follow the plan carefully.
Sanding and Finishing the Station
Sanding and finishing are crucial steps to ensure your cordless drill charging station looks professional and lasts long. Start by sanding all surfaces with medium-grit sandpaper (120 grit) to smooth out any rough edges or splinters. Wipe away dust with a clean cloth. For a polished finish, apply paint, stain, or polyurethane, following the manufacturer’s instructions. Allow the finish to dry completely before applying a second coat if needed. Lightly sand between coats for a seamless look. Once dry, attach any hardware like drawer pulls or hinges. Finally, ensure the station is dry and ready for use. This step transforms raw wood into a durable, attractive storage solution for your tools.

Design Variations and Customization
Explore various layouts and customization options for your cordless drill charging station. Add trays, drawers, or adjustable compartments to suit your tool collection and style.
Layout Options for Different Tool Collections

Free printable plans offer versatile layouts to accommodate various tool collections. Choose from 4, 6, 8, or 10-slot designs, each tailored to fit different drill sizes and brands. Customize the arrangement by adding drawers, trays, or adjustable compartments to store bits, batteries, and other accessories. These designs cater to both small and extensive tool sets, ensuring efficient use of space. With adjustable dividers and modular configurations, you can adapt the layout to your specific needs, maximizing storage and organization. Whether you prefer a wall-mounted or freestanding station, these plans provide flexibility to create a setup that perfectly suits your workshop or garage requirements.
Adding Personal Touches to the Design
Personalizing your cordless drill charging station enhances functionality and aesthetics. Consider using reclaimed wood for a rustic look or a sleek finish for a modern vibe. Add decorative trim or molding for a polished appearance. Upgrade hardware with stylish knobs or handles to match your workshop decor. Incorporate custom compartments or trays for specific drill bits or accessories. Choose a paint or stain color that complements your tools, and add a clear coat for durability; Engrave your name or a personal message for a unique touch. Install LED lighting for better visibility and a modern look. Ensure ergonomic design with accessible shelves or hooks for chargers and cables. Plan for modular expansion to adapt to future needs, allowing easy additions without disrupting the current setup. These personal touches make your project truly one-of-a-kind.
Downloading and Using the PDF Plans
Access free PDF plans online from sites like Scribd or Her Tool Belt. Print and follow the detailed guide for a seamless DIY project.
Accessing Free Printable Plans Online
Free printable cordless drill charging station plans are widely available online. Websites like Scribd and Her Tool Belt offer downloadable PDF guides. These plans are designed to help DIY enthusiasts create efficient storage and charging solutions. Many platforms provide customizable designs, catering to different tool collections and workshop layouts. Simply search for “free cordless drill charging station plans PDF” to explore various options. Once downloaded, print the plans and follow the step-by-step instructions. Ensure your printer settings match the document size for clarity. These plans are perfect for organizing your tools neatly, saving time and space in your workshop.
Printing and Following the Detailed Guide
Once you’ve downloaded the free printable cordless drill charging station plans, print them on standard paper or cardstock for durability. Ensure your printer settings match the document size to maintain clarity. Review the cut list and materials list to prepare everything needed. Follow the step-by-step instructions carefully, starting with cutting and assembling components. Sand and finish the station for a polished look. Mount the station near a power outlet for convenience. Customize the layout if desired, such as adding dividers or drawers. Double-check measurements and pre-drill holes to avoid errors. By following the guide, you’ll create a functional and stylish storage solution for your tools.